Did you recently signed up for Quickbooks Online and have no idea how to set it up? Perhaps you are now growing your business and you are looking at using Quickbooks Online to help you be more efficient. Regardless of where you are with your experience with Quickbooks Online, we can all agree that you chose Quickbooks to help you get organized, figure out your finances, and set your business up to be more efficient.
In today’s fast-paced digital world, businesses of all sizes are using QuickBooks Online (QBO) because it provides a variety of features to simplify financial tasks and enable smooth operations. Whether you’re a small business owner, freelancer, or an accounting professional, harnessing the power of QuickBooks Online can revolutionize your financial management practices.
The issue however that many have with Quickbooks Online is setting it up properly and making sure it is being using correctly.
In this comprehensive step-by-step Quickbooks Online setup checklist and guide, we will walk you through the ins and outs of setting up QuickBooks Online, empowering you with the knowledge and expertise to handle your finances efficiently.
Throughout this guide, we will explore the essential features and functionalities of QuickBooks Online that need to be setup before you start using the software. You’ll learn how to set up your company profile, manage customers and vendors, track income and expenses, create and send professional invoices, and more. Our step-by-step checklist and practical tips will ensure you unlock the full potential of QuickBooks Online to take charge of your financial success.
Whether you’re a tech-savvy entrepreneur or someone new to accounting software, this guide will cater to all skill levels, allowing you to get started quickly and confidently navigate the software’s interface. By adopting QuickBooks Online as your financial partner, you’ll gain an edge in making informed business decisions, keeping your finances in order, and paving the way for sustainable growth.
Here is the detailed step-by-step Quickbooks Online setup Checklist to help you get the software running in no time.
1. Configure Settings in Quickbooks Online
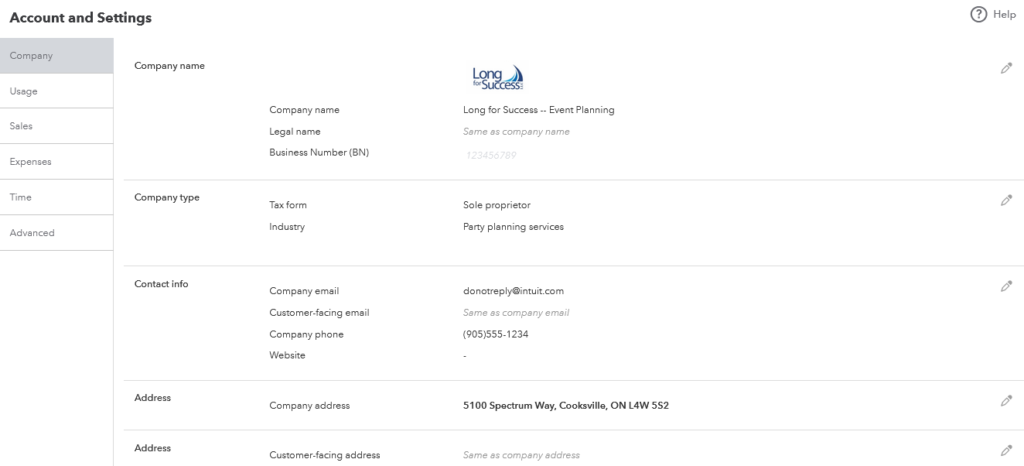
Before using QuickBooks Online, it is best to configure your settings to make sure everything is ready for proper use. This is probably the most important step before using your Quickbooks Online account.
☐ Click the Gear Icon (top right corner), then click Accounts and Settings
Company Settings
☐ Enter Company Name and Business Number
☐ Enter Company Type information
☐ Add company address, customer-facing address, and legal address (if different from company address)
Sales
☐ If you will be sending invoices, click customize look and feel of invoices to customize invoices
☐ Click Invoice under “New Style”
☐ Customize the invoice to fit your business needs
☐ Configure “Sales form content”
☐ Turn on “Invoice payments” to allow customers to pay invoices via credit card and bank payments (direct deposit)
☐ Configure “Products and services”
☐ If you wish to track inventory in Quickbooks, turn on “Track inventory quantity on hand” and “Track quantity and price/rate”
☐ Configure “Messages” that will be sent with the invoices. Be sure to use the “Sales form” drop down to configure the messages for specific forms
☐ Under “Reminders”, turn on “Automatic Invoice Reminders” to send automatic reminders to clients for overdue invoices
☐ Configure the interval to send the automatic invoices as needed
☐ Turn on “Statements” to show overdue invoices on the invoice
Payments
☐ Add a “Deposit accounts” to tell Quickbooks where to payments made to your Quickbooks invoices
☐ Under “Chart of Accounts” choose the accounts you want Quickbooks to categorize deposits and their process fees
Advanced
☐ Configure all of the “Accounting” settings
☐ Configure “Company Type”
☐ Configure “Chart of Accounts” as needed
☐ Configure “Categories” as needed
☐ Configure “Automations” as needed
☐ Under “Currency”, make sure your Home Currency is correct
☐ Turn on Multicurrency if you will receive or pay funds in a currency that is different from your Home Currency. Note that once this is turned ON, it cannot be turned off.
2. Create Chart of Accounts in Quickbooks Online
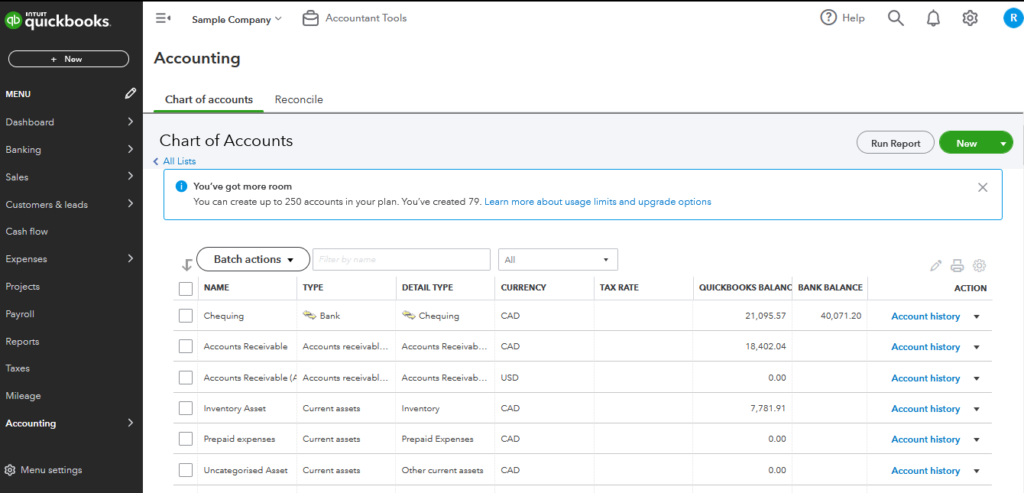
In Quickbooks Online, your chart of accounts has all the in items you will using to categorize your bank transactions. These includes assets, liabilities, equity, sales, and expenses accounts. Make sure to add as many items as you need to adequately categorize transactions that will come from your bank feeds. Don’t worry though, you can always add new items to the chart of accounts later on. Here is a checklist to setup your chart of accounts in Quickbooks Online.
☐ To set up your chart of accounts, click “Accounting” on the left menu, then click “Chart of Accounts”. Some of the accounts you need will already be setup for you but you can add any that may not have been included.
☐ Create accounts for your assets (this may include your bank accounts, AR, inventory, prepaid expenses, etc.)
☐ Create accounts for your liabilities (this may include loans, accrued expenses, credit cards, line of credit, etc.)
☐ Create accounts for your equity (this may include common stocks, owner’s draw, etc)
☐ Create accounts for your sales (this may include product sales, service sales, digital sales)
☐ Create accounts for your expenses (this may include software expense, marketing expense, office supplies, etc.)
3. Set up Sales Taxes in Quickbooks Online
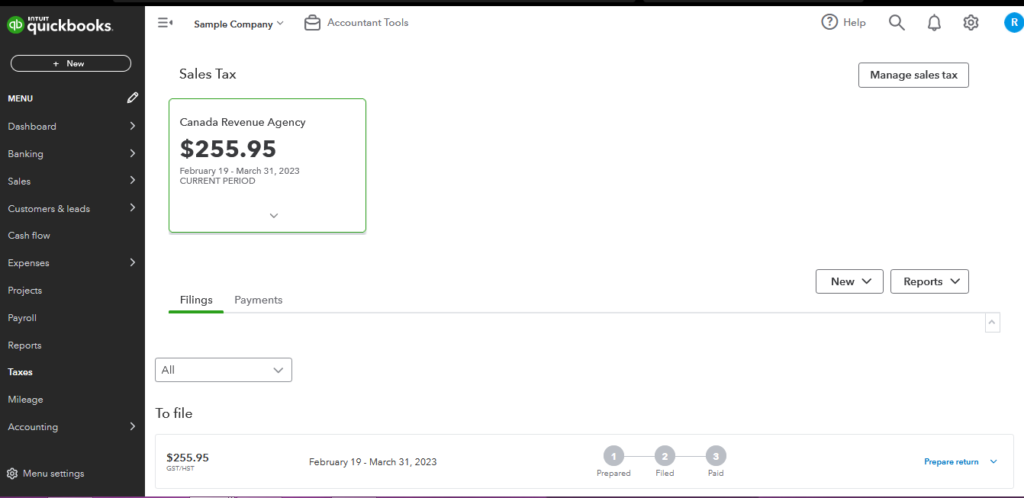
If you are running your business in Canada and needs to track sales takes, it will be a good idea to set this up, after you have set up your chart of accounts and before you start any categorization.
☐ On the left side menu, click “Taxes” to view your sales tax settings.
☐ Click “Manage Sales Tax” and add the appropriate sales tax agencies you will be collecting tax for
4. Add Products and Services
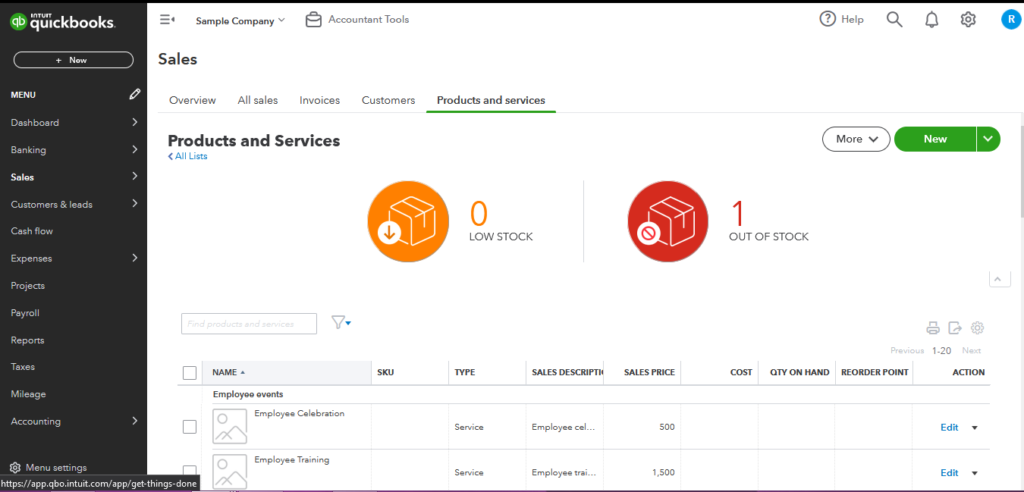
Before you send an invoice, you need to setup your products and services. The products and services menu holds all the services and products used to populate your invoices.
☐ On the left side menu, click “Sales”, then click “Products and services” to start adding your products and services.
☐ Click “New” to add the appropriate product or service
☐ Add “Inventory” if you want to track inventory in Quickbooks (remember to turn on “Track inventory quantity on hand” and “Track quantity and price/rate”)
☐ Add “Nnon-inventory” for products you don’t want to track
☐ Add “Service” if you are providing non-physical products
☐ Add “Bundles” by combining products and services together
Setup Inventory Products in Quickbooks Online
☐ Add the name, and optionally, category and class of the product
☐ Add the initial quantity, the date of count and optionally, reorder point
☐ Choose the correct “Inventory Asset Account” to track your inventory costs
☐ Add Sales price/rate of your inventory. This can be changed when you create an invoice
☐ Choose the correct “Income Account” to track your sales
☐ Select inclusive of sales tax if the price includes tax, otherwise uncheck this
☐ If the previous item was ticked, choose the “Sale tax” account to charge tax
☐ Optional, add the “Purchasing information”, although this may not be required for most businesses
☐ Repeat setup for product variants
Setup Services and Non-Inventory Products in Quickbooks Online
☐ Add the name, and optionally, category and class of the product
☐ Make sure “I sell this product/service to my customers” is selected
☐ Add Sales price/rate of your product and service. This can be changed when you create an invoice
☐ Choose the correct “Income Account” to track your sales
☐ Select inclusive of sales tax if the price includes tax, otherwise uncheck this
☐ Choose the “Sale tax” account to charge tax
☐ Optionally, add the “Purchasing information”, although this will not be required for most businesses
☐ Repeat setup for product/service variants
5. Add Bank Chequing and Credit Cards to Quickbooks Online
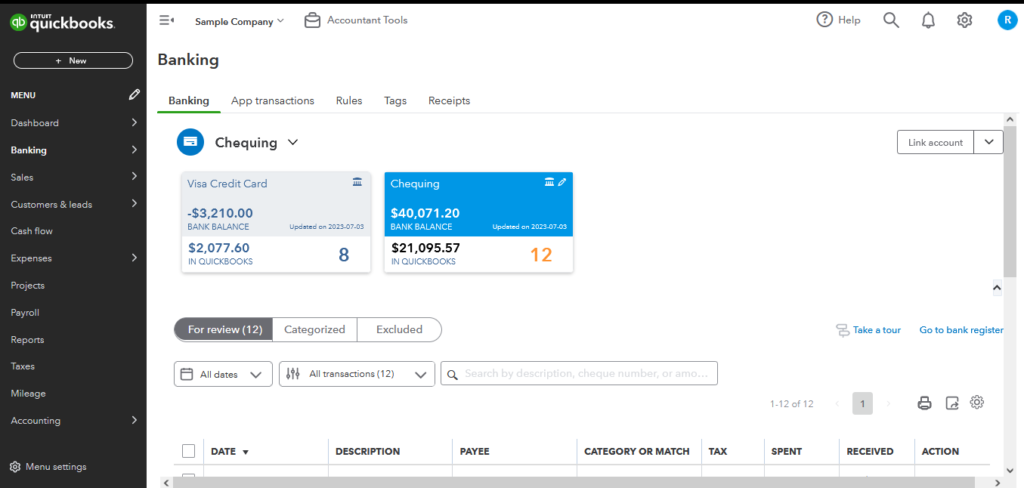
This part of the setup will allow you to start using Quickbooks Online fully. You can add your business chequing and credit card bank feeds which will pulls transactions from your bank account directly into Quickbooks. You can then categorize these transactions using items from the chart of accounts.
☐ Click Banking on the left side menu then click “Transactions” or “Banking”
☐ Click “Link Account” and follow the steps to connect your bank account
☐ Repeat until all bank accounts are connected
6. Add Users to Your Quickbooks Online
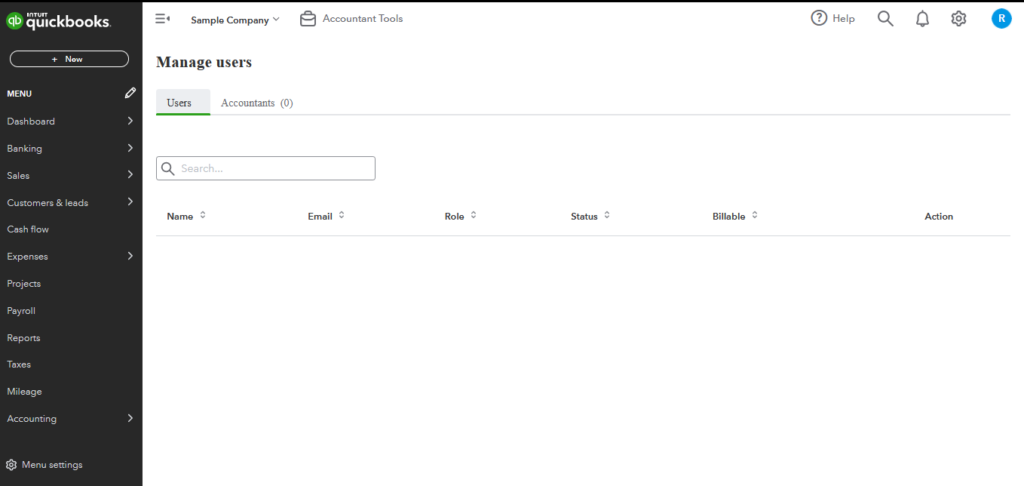
You can add employees and accountants to Quickbboks with a few clicks. There are 2 main types of users to add – team members and accountants/bookkeepers. Team members are your members of your organization that you work closely with. You can assign what these users are allowed to do in your Quickbooks. For example, you can assign some user to only issue invoices and others to only view the purchases module. Access for accountants or bookkeepers on the other hand allow them to have access to all features of Quickbooks Online except the ability to add/remove users. This allows them to better manage the software for you.
☐ Click the Gear Icon (top right corner), then click “Manage Users” to configure the following:
☐ Under the “Users” tab, add any team members you wish
☐ Assign appropriate roles and permissions for accessing and editing data.
☐ Under the “Accountants” tab, add Bookkeepers and Accountants only
7. Connect Apps and Other Integrations to Quickbooks Online
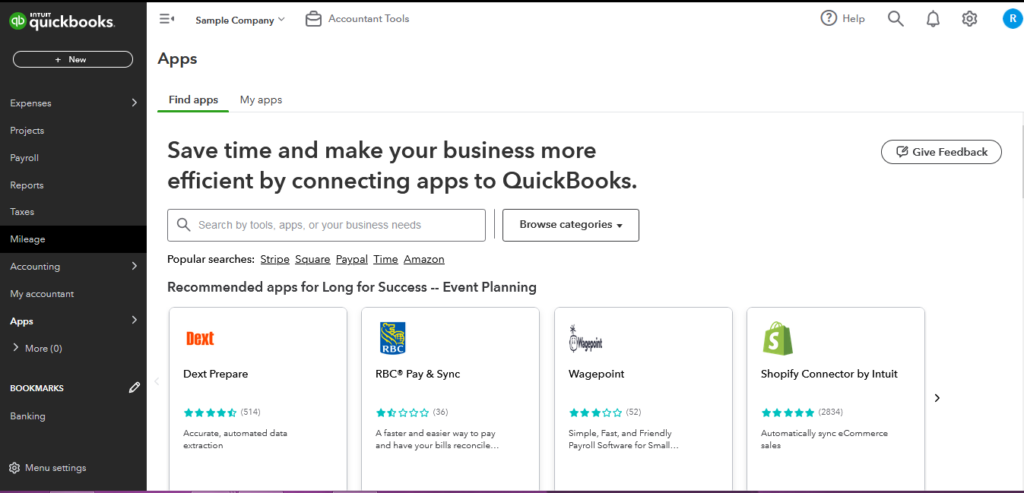
If you have apps you would like to connect to Quickbooks, it is best to do so when the first 6 steps are completed.
☐ Click the Apps button on the left side menu, click find apps, then configure the following:
☐ Find and connect any apps you wish to Quickbooks Online
☐ Configure the settings of the apps so that it works smoothly with Quickbooks
8. Optional – Add Vendors and Customers to Quickbooks Online
Adding vendors and customers is optional in Quickbooks. You can choose to import existing customers and vendors or add them as you run the business.
Add Suppliers to Quickbooks Online
☐ Click the “Expenses” button on the left side menu then click “Suppliers”
☐ Add your suppliers and their contact information. Be sure to select the appropriate currency for the supplier
☐ Alternatively, click the arrow beside “New Supplier” to import a list of suppliers
Add Customers to Quickbooks Online
☐ Click the “Sales” button on the left side menu then click “Customers”
☐ Add your customers and their contact information. Be sure to select the appropriate currency for the customer
☐ Alternatively, click the arrow beside “New Customer” to import a list of customers
Conclusion to Quickbooks Online Setup Checklist
Remember that setting up QuickBooks Online can be a complex process, and it’s crucial to invest time in understanding the platform’s features and functionalities to make the most of it for your business’s financial management. If needed, don’t hesitate to seek professional assistance from an accountant or bookkeeper.

